If your brow seems to look flat and lifeless, maybe you’re lacking one little thing—a brow highlighter. Groomed and sculpted brows are perfectly stunning as they are. However, if you wish to showcase and level up your brow game, a little dab of shimmer on the right areas can dramatically change how it appears.
Brow highlighters are typically used for brows. Not only that, the effect of the brow highlighter can not only accentuate your brow bone and define your brows more, it can brighten and make your eyes appear younger.
However, there are so many more ways to use the usual brow highlighter than just highlighting your brows. Let’s put this little baby to use to its full potential.
Know more about your brow highlighter and find out the great ways to use this unique makeup product.
Check them out!
The Brow Highlighter Overview
There are many kinds of highlighters and shimmers in the cosmetic industry, but the brow highlighter was made specifically for one important thing—basically highlight your brows. So, does it only do that, or maybe there is more to this handy shimmer.
Let’s find out what’s a brow highlighter and what’s so amazing about it.
What is Brow Highlighter?

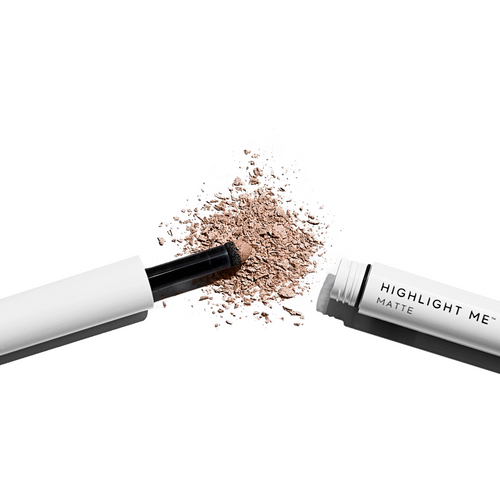
Brow highlighters are commonly used for your eyebrows. This compact cosmetic is placed typically under and/or above the brow bone – whichever suits you. It’s usually a light pigmented cream shimmer in the form of a pencil or a small tipped pen.
This product is made to enhance, frame, and lift your eyebrows. Brow highlighters can give a huge change in the overall look of your eye area.
It’s best used to make the eyebrows appear more well-defined and sharp. With just enough product applied to the right areas, your eyebrows won’t look dull and flat anymore.
How to Use and Apply a Brow Highlighter?
If you’ve never used a brow highlighter before, we got you! Here are the basic steps on how to use a brow highlighter correctly.
Step 1 – Clean Your Brows

After you draw and fill your brows, they won’t look as clean and sharp as expected. There might be some product overfilling or out of the line. So, to have the perfect eyebrows, it’s always best to finalize and shape them cleanly.
To clean and shape your brows, you can use a Q-tip to remove excess makeup that is very visible. Gently remove the overlining product without ruining your brow shape.
For a well-defined brow shape, apply a small amount of concealer right under the brow with a flat thin brush. To make it sharper, apply the same method above the brow arch to the tail. Use the same brush or your finger to lightly blend the product.
Step 2 – Applying the Brow Highlighter
Following your brow’s natural shape, apply the product right under your brow arch in one smooth stroke. Make sure to put just the right amount and not overdo it.
With the same technique, apply the highlighter also above the brow line. This will outline your brow area. This method will also accentuate your brow bone giving your face a more defined and sculpted look.
Tip: It’s best to choose cream formulas rather than compact powder formulas to avoid flaking. Also, pick neutral shades and avoid colored pigments.
Step 3 – Blending the Product

Of course, you want your brows to look as natural as possible. That is why it’s important to always blend the products applied to your face. This will not only even out the makeup but will make harsh lines blurred and create a natural overall look.
With a small soft, dense brush, even distribute the shimmer and blend it out. You can also use your finger to do the job if you don’t have much makeup brush. This technique will complete your brow makeup resulting in perfectly shaped flawless brows.
Other Ways to Use the Brow Highlighter
With its consistent formula, brow highlighters can be used in many ways in your makeup process. Also, the unique and compact shape of the brow makeup can help apply to other parts of the face more precisely. Here are other ways to use your brow highlighter.
The Waterline

It doesn't matter whether you prefer a wide doe-eyed appearance (or simply want to appear less drowsy on a Monday morning), this brightening pencil will do the trick. The powerful color pay-off and beautiful nude tone are fantastic for making eyes appear larger, more alert, and brighter than ever before!
Gently line your eye’s waterline with the highlighter. Don’t forget to apply it to the inner corners of your eyes as well to make it pop out more. Make sure not to over-apply.
Tip: If the makeup on the waterline runs or smudges, use a Q-tip to gently clean the area.
The Cupid’s Bow

For those who keep up with the latest beauty trends, you're probably aware that a well-defined cupid's bow—that small dip in the upper lip—is the icing on top of a stunning lip appearance.
While not everyone's lip shape has a large cupid's bow, you can still make yours stand out by using a brow highlighter to accentuate it. You simply apply a small amount of highlighter in a V-shape or just follow the natural shape of your upper lip. Blend and brush off excess shimmer and you’re good to pucker up.
The Tip and Bridge of the Nose

You can use the highlighter to illuminate your nose- to bring attention to where light naturally hits your nose. The nose bridge is the highest point of the face, so it makes sense to add highlighter. Our highlighter is a universal shade to match any skin tone. From the top of your nose down, draw a thin line. It makes the bridge of the nose stand out more, so make sure it's not too thick.
If the tip of your nose is thick or wide, only apply a highlighter to the middle of your nose and not the whole thing. Make sure to blend the product well on your skin.
Time to Shine
Aren’t brow highlighters great? Such a compact shimmer can come a long way and be used in so many ways. Easy to bring for quick touch-ups and easier to use for instant glow on your everyday look.
Now that you know the low down on the basics and awesome uses of the brow highlighter, you’re ready to add them to your makeup must-haves.
But, with a lot on the market, the Madluvv Highlight Me™ Brow Highlighter is a total game-changer. Check them out today and find out how to avail the interest-free installment terms.


