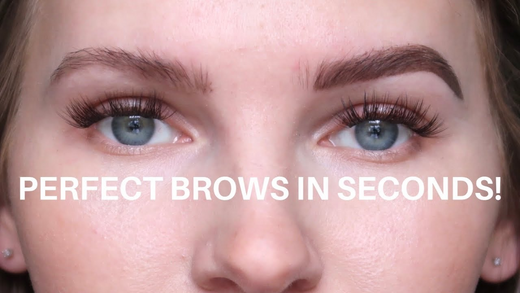
Have you seen the trending wonder brow stamp on Tiktok that can give you the perfect set of eyebrows in seconds? We’ll you’re in the right place.
If are wondering if this beauty hack is possible, we’re here to give you the ultimate guide to achieving the perfect brows that you’ve always wanted in the least possible time.
No need to spend so much time facing the mirror trying to draw, shape, and chisel your eyebrows every day because we got the brow buddy that you will luvv!
Wanna learn how to have the perfect eyebrows as easily as 1-2-3?
Nuff chit chat. Let’s begin!
Knowing Your Brows

Before anything else, you need to know more about your eyebrows. You might be strutting a not-so-flattering shape all these years, or maybe you’re using the wrong shade.
It is said that if the eyes are the windows to your soul, the eyebrows are the frame. So, make sure that’s one heck of a beautiful frame.
With that, let’s get to know your brows more with the golden rules for those flawless eyebrows that are always “on fleek”.
Rule #1 (The Right Color is a Must)

Brows can look misplaced because the colors don’t match. The basic rule of thumb for your brow color is to stay within the 2 shade range of your hair color.
So, for every varying color, there are considerations you need to keep in mind. If you’re not sure about which shade you should opt for, you can find your perfect color match by TAKING THIS QUIZ.
Rule #2 (The Correct Shape is the Key)

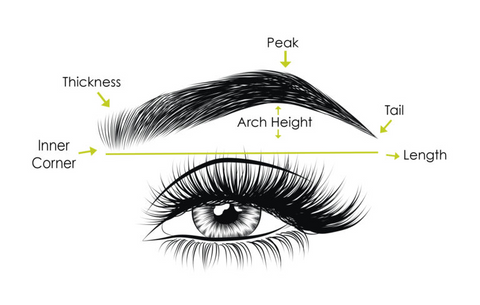
To achieve the perfect brows, you need to have the perfect shape for your facial features. We’re talking about the thickness, the angle, the arch, the length, the symmetry, and the style of your brows.
You can determine your ideal brow shape by mapping your brows with the “Golden Ratio.” Before you proceed to fill in your brows, you need to know the basic points of your brows—the inner corner, the arch, and the end or tail.
1.The Inner Corner – should start directly above the middle of the nostril.
2.The Arch – should be lined up with the highest point of the eyebrow. This can be identified by connecting the edge of the brows with the corner eye and nostril.
3.The End – should be at the outside of the corner of the nose and line up at the outside corner of the eye. This should never drop below the level of the inner corner.
With this, you can mold and shape your eyebrows to their most ideal form. To create an impression you can tweak it to your suitable arch angle and thickness.
Plus, don’t forget to keep in mind the symmetry of both brows.
Rule #3 (Grooming is the New Thing)

Before you start filling your brows, it’s best to have them groomed. Perfect brows should be neat and clean.
Whether you get your brows waxed or threaded, it’s essential to have them groomed at least once a month.
This is to maintain the natural shape and growth of your eyebrows. Also, filling in your eyebrows becomes easier when your brows are shaped, groomed, and trimmed.
If your brows are naturally neat, you can pluck excess growing hair below the arch.
Fill In Your Brows in Only 3 Easy Steps
Now you are all set and ready to stamp your way to the sleek and on-fleek brows that everyone’s talking about. Just follow these steps:
Step No. 1 – Stencil & Brow Matching

First, prepare your stamp before anything else. Simply untwist the stamp and you will see that there is the sponge on one end and the pomade in the cap. To get more product on your sponge, twist the sponge into the pomade located in the cap.
Then, choose a stencil among the five shapes available that best fits your natural eyebrow growth and shape.
With the chosen stencil in hand, you align the end of the stencil to the tail or end of your brow.
After fitting the stencil to your brow tail, put one finger on “point one” of your stencil and lay it flat on your brow bone.
Once you have secured your brow’s position, place a second finger on “point two” of the stencil.
Note: Keep in mind to make sure that the angle of the stencil is the same for both brows.
Step No. 2 – Stamping & Filling Time

Now that you have correctly positioned your stencil on your natural brows, you may begin stamping your brows.
Take the sponge applicator and begin to lightly pat your brows starting at the tail of your brow or the “start here” point.
Dab along with the spaces until your brow is filled enough to your satisfaction. Pat until you finish at the most fitting brow length (short or long).
Make sure not to put too much product on the inner corner. This is because brows are naturally lighter towards the center of the face.
Tip: If your brows don’t match any of the stencils, you can apply the product first on the tail up to the peak. Pause and slightly turn your stencil until it matches the remaining body of the brow. Continue patting finishing to the desired inner corner of the brow.
After finishing one brow, clean your stencil with a dry paper towel and wipe away the product on the stencil. Now, you will flip the stencil to begin on the other brow.
Repeat the process on your other eyebrow. Make sure that both brows are aligned and symmetrical in distance, height, and shape. This is important to follow in order to achieve the perfect eyebrows.
Reminder: “Brows should be sisters, not twins.”
Step No. 3 – Finishing Touches

At this point, you have completely filled and shaped your brows.
Now for the final step. With a spoolie, lightly brush your brows to evenly distribute the product and soften the look of the makeup.
Also, use the spoolie to comb your brows’ hair into place.
To finish your look, you can either grab a Q-tip or a concealer brush to clean your brows.
Use a Q-tip if you just want to clean the lines and if you opt for a much clean and natural look.
To have much more defined clean-cut eyebrows, use a concealer brush and dip it into a small amount of concealer or foundation.
Underline the entire brows.
After this, blend the excess concealer downward or outward into the skin to avoid harsh lines. You can also use a spoolie to brush up some of the excess concealers into the brows, this creates a much more natural look.
To finish this process, set the concealer with a translucent foundation powder or nude eyeshadow using your small dense brush.
Voila! You have the perfect eyebrows to share with the world! #LoveMadLuvv #MadluvvBrowStamp
Falling In Love with Madluvv?
Can’t get enough of Madluvv’s Brow Stamping Kit?
Grab some more and share them with your lovely friends. Make the world a better place one eyebrow at a time.
And if you love the product so much, don’t miss to grab a refill.
We have refills for all the amazing colors for you to enjoy. Check them out and grab your Madluvv Brow Stamp today!


