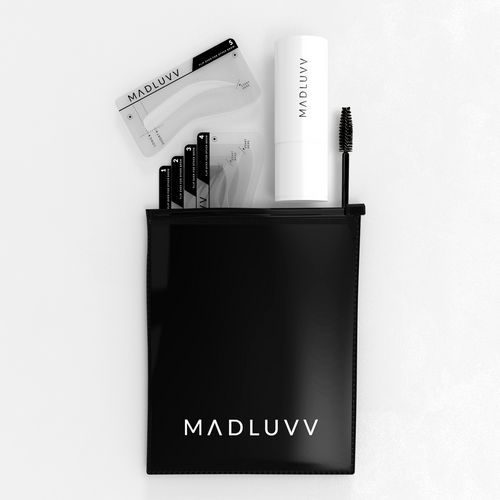
How to Use Your New Brow Stamp Kit, Step by Step:

Not sure where to start? Here are 3 easy tips to help you choose your perfect stencil.
 Need more product? Just twist the sponge back into the cap anytime.

 Even Brow Trick: Line the stencil up with your finished brow, flip it over, and slide it straight across to your other brow.

Frequently Asked Questions:
Why does my stamp look dry or empty?
The Brow Stamp is designed with a protective top layer to preserve the pomade inside the cap. If the sponge looks dry or isn’t picking up product, here’s what to do:
Step 1: Place the sponge applicator into the cap, press down, and twist 3-4 times (like opening a medicine bottle). This helps break through the protective layer and loads more pomade onto the sponge.
Step 2: Remember — the pomade is in the cap, not under the sponge. Twisting in the cap activates the product and gives you full color payoff.
Watch our quick tutorial here.
Most customers find that after this quick priming step, the stamp delivers smooth, consistent results!
What do I do if my stamp isn’t the right color?
The intensity of your Brow Stamp color depends on how much pressure you apply when stamping.
If Your Stamp Is Too Dark:
- Stamp onto a paper towel before applying to remove excess product.
- Use a lighter touch—the less pressure you apply, the softer the color will appear.
- Start light and build up gradually to reach your desired shade.
If Your Stamp Is Too Light:
- Remember to reload the sponge by inserting it back into the cap to pick up more product.
- Use more pressure and apply layers. The pigment is buildable! Layering the product will result in a bolder look.
If you still aren’t satisfied with your shade, learn about our Color Match Guarantee here.
Why are my brows rubbing off?
If your brows are rubbing off before the end of the day, oils on the skin may be affecting adhesion. Before applying your Brow Stamp, make sure your face is clean and free of oils.
To get even longer wear (up to 36-hour brows!), follow the Prime, Stamp, Seal method:
1. Prime: Start by applying Prime Me Brow Primer, the world’s first-ever brow primer. This matte, oil-free formula enhances grip and longevity, ensuring vibrant, smudge-proof brows. It creates a smooth, shine-free base while conditioning brows and preventing flaking or dryness.
2. Stamp: Apply your Brow Stamp Kit as usual.
3. Seal: Lock your brows in place with Seal Me Brow Sealer, the ultimate product for long-lasting, budge-proof brows. It’s smudge-proof, waterproof, and lightweight, holding through sweat, humidity, heat—even sleep. Your brows stay locked in for up to 36 hours.
- Application Tips: Start by applying a thin layer—less is more. If needed, apply a second layer after the first has dried. To ensure maximum hold, avoid touching your brows after application.
By following these steps, your brows will stay flawless all day (and night)!
More Questions?
Check out our full FAQ page or email us at info@madluvv.com. We’d luvv to help!


